
 看下面,Python系列知识在此
原文链接:Python 爬虫(七):pyspider 使用_Python小二-CSDN博客
原文作者:Python小二
目录
1 简介
pyspider 是一个支持任务监控、项目管理、多种数据库,具有 WebUI 的爬虫框架,它采用 Python 语言编写,分布式架构。详细特性如下:
- 拥有 Web 脚本编辑界面,任务监控器,项目管理器和结构查看器;
- 数据库支持 MySQL、MongoDB、Redis、SQLite、Elasticsearch、PostgreSQL、SQLAlchemy;
- 队列服务支持 RabbitMQ、Beanstalk、Redis、Kombu;
- 支持抓取 JavaScript 的页面;
- 组件可替换,支持单机、分布式部署,支持 Docker 部署;
- 强大的调度控制,支持超时重爬及优先级设置;
- 支持 Python2&3。
pyspider 主要分为 Scheduler(调度器)、 Fetcher(抓取器)、 Processer(处理器)三个部分,整个爬取过程受到 Monitor(监控器)的监控,抓取的结果被 Result Worker(结果处理器)处理。基本流程为:Scheduler 发起任务调度,Fetcher 抓取网页内容,Processer 解析网页内容,再将新生成的 Request 发给 Scheduler 进行调度,将生成的提取结果输出保存。
2 pyspider vs scrapy
- pyspider 拥有 WebUI,爬虫的编写、调试可在 WebUI 中进行;Scrapy 采用采用代码、命令行操作,实现可视化需对接 Portia。
- pyspider 支持使用 PhantomJS 对 JavaScript 渲染页面的采集 ;Scrapy 需对接 Scrapy-Splash 组件。
- pyspider 内置了 PyQuery(Python 爬虫(五):PyQuery 框架) 作为选择器;Scrapy 对接了 XPath、CSS 选择器、正则匹配。
- pyspider 扩展性弱;Scrapy 模块之间耦合度低,扩展性强,如:对接 Middleware、 Pipeline 等组件实现更强功能。
总的来说,pyspider 更加便捷,Scrapy 扩展性更强,如果要快速实现爬取优选 pyspider,如果爬取规模较大、反爬机制较强,优选 scrapy。
3 安装
3.1 方式一
pip install pyspider
这种方式比较简单,不过在 Windows 系统上可能会出现错误: Command "python setup.py egg_info" failed with error ... ,我在自己的 Windows 系统上安装时就遇到了该问题,因此,选择了下面第二种方式进行了安装。
3.2 方式二
使用 wheel 方式安装。步骤如下:
-
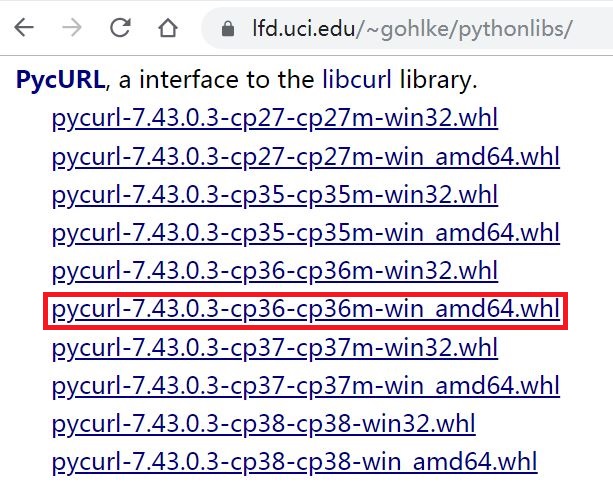
pip install wheel安装wheel; - 打开网址 https://www.lfd.uci.edu/~gohlke/pythonlibs/,使用
Ctrl + F搜索pycurl,根据自己安装的 Python 版本,选择合适的版本下载,比如:我用的Python3.6,就选择带有cp36标识的版本。如下图红框所示:
- 使用 pip 安装下载文件,如:
pip install E:\pycurl-7.43.0.3-cp36-cp36m-win_amd64.whl; - 最后还是使用
pip install pyspider安装。
执行以上安装步骤后,我们在控制台输入 pyspider ,如图所示:
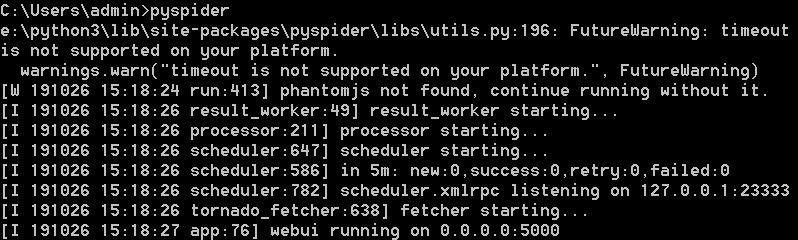
出现上述结果说明启动成功,如果启动时一直卡在 result_worker starting... ,我们可以再打开一个控制台窗口,同样输入 pyspider 进行启动,启动成功后关掉之前的窗口即可。
启动成功后,我们再验证一下,打开浏览器,输入 http://localhost:5000 访问,如图所示:
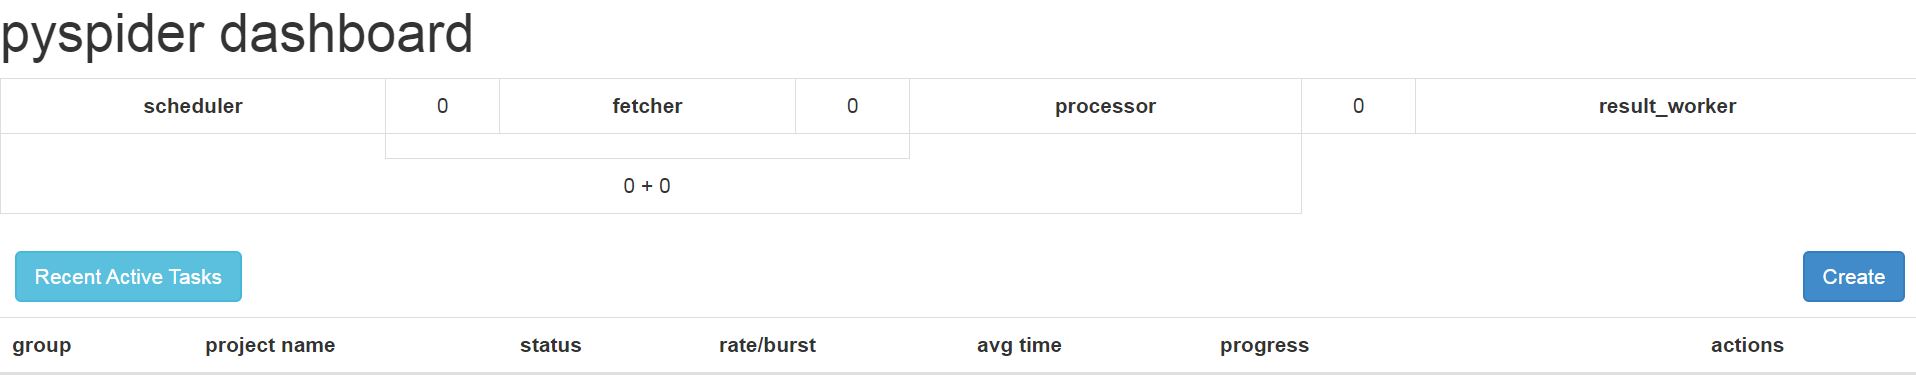
我们发现确实启动成功了。
4 快速上手
4.1 创建项目
首先,我们点击图形界面中的 Create 按钮开始创建项目,如图中红框所示:

然后会跳出信息填写窗口,如图所示:
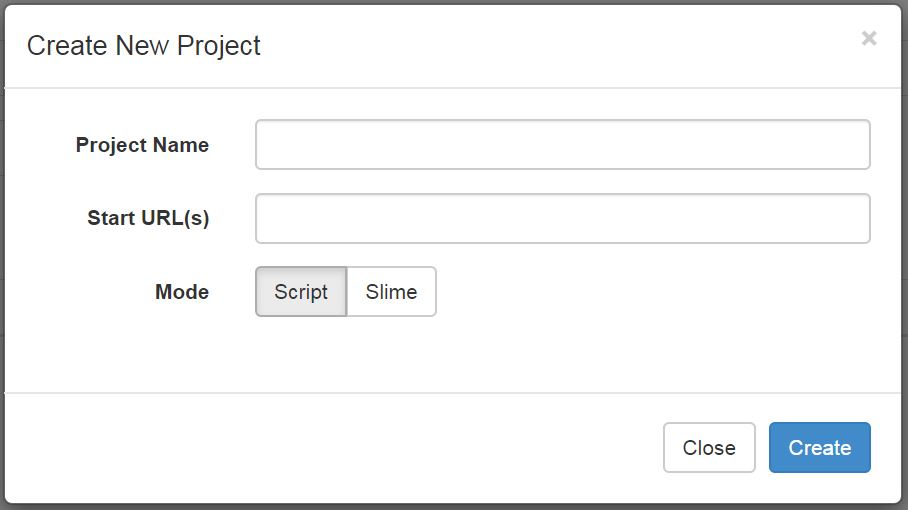
- Project Name :项目名
- Start URL(s) :爬取链接地址
我们需要填写 Project Name 和 Start URL(s) ,这里以链家网二手房信息为例:https://hz.lianjia.com/ershoufang/,填写完成后点击 Create 按钮。结果如图所示:
4.2 爬虫实现
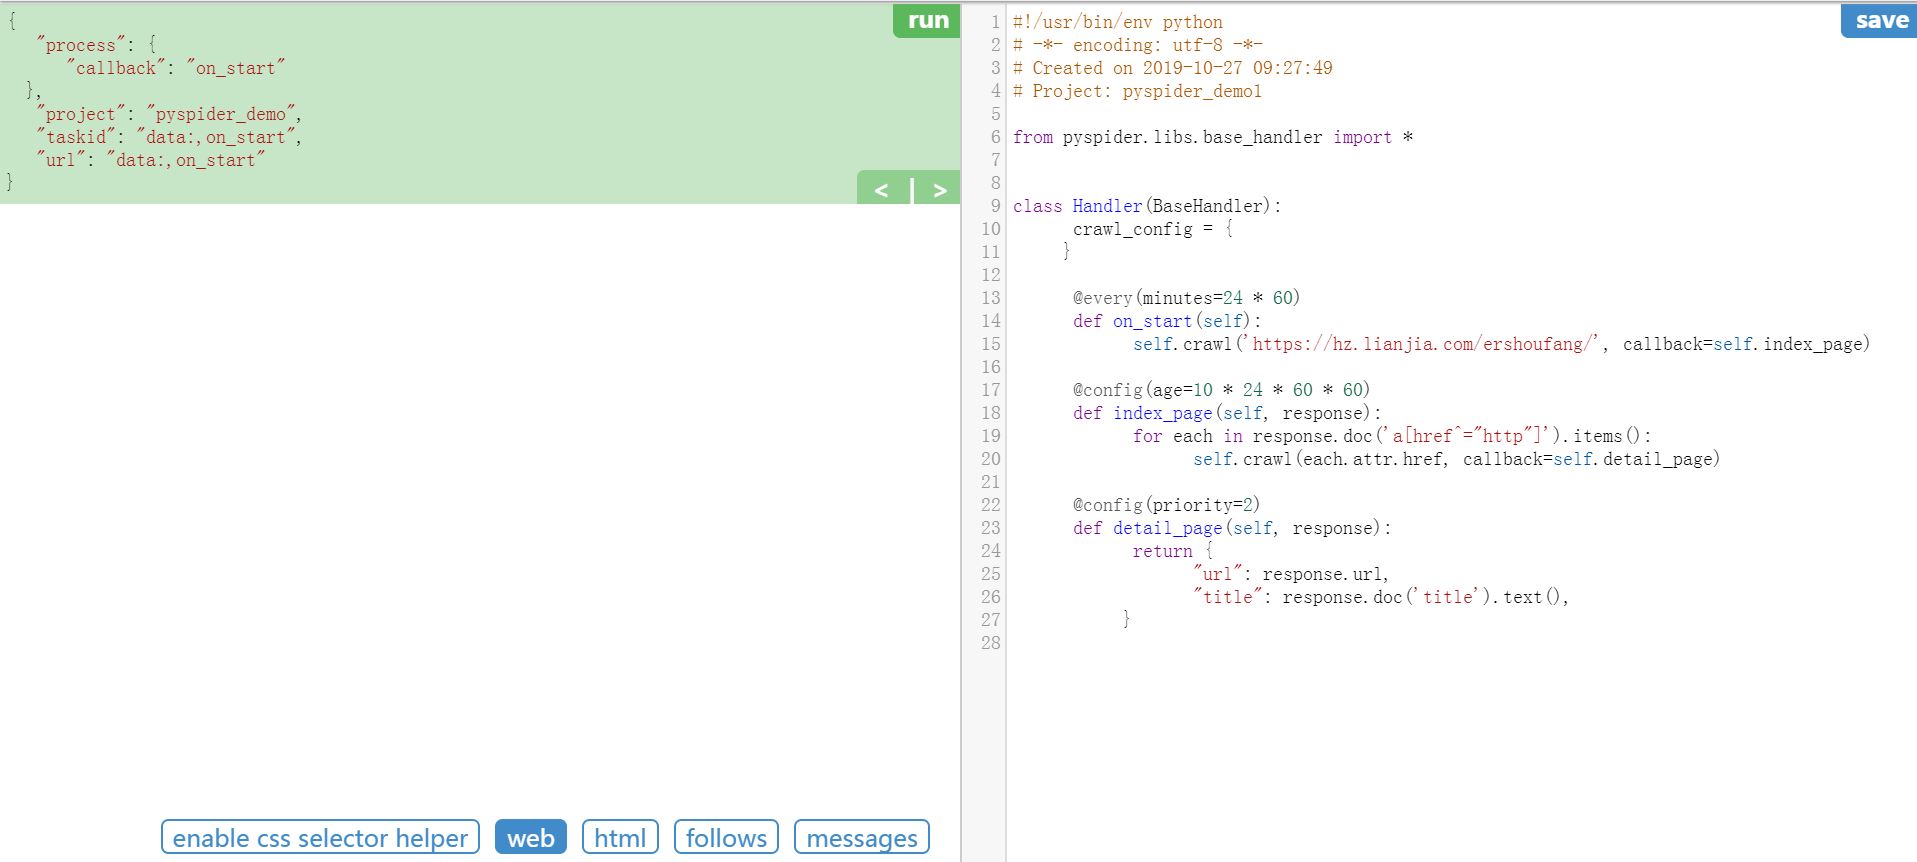
pyspider 访问 https 协议的网站时会提示证书问题(通常为 HTTP 599 ),因此我们需要在 crawl 方法中添加参数 validate_cert=False 来屏蔽证书验证。如图所示:
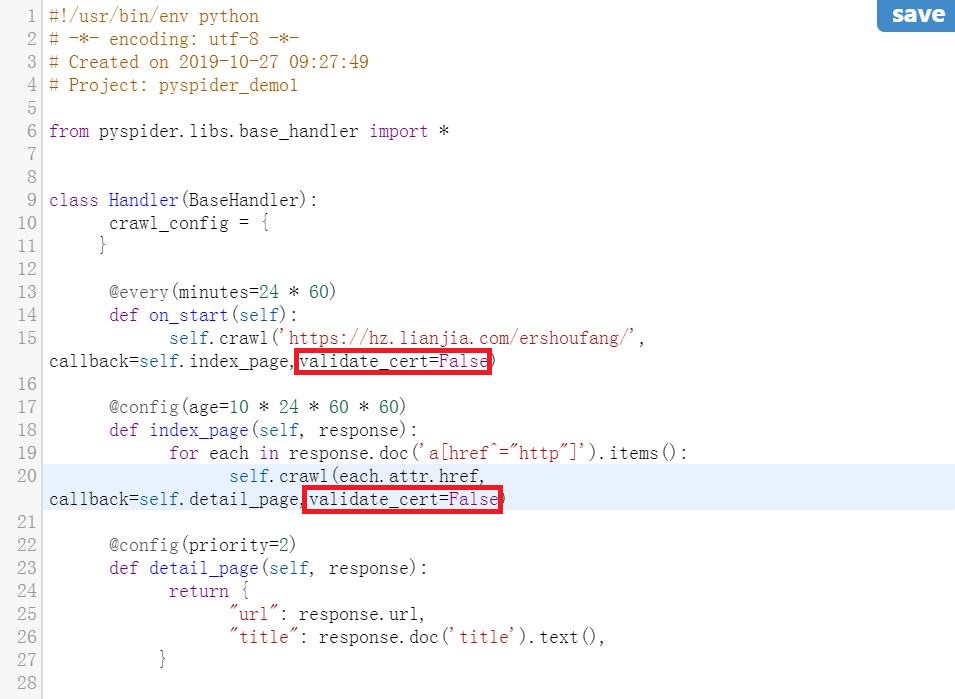
我们计划获取房子的单价(unit_price)、描述标题(title)、卖点信息(sell_point),编写具体实现如下所示:
from pyspider.libs.base_handler import *


class Handler(BaseHandler):
    crawl_config = {
    }

    @every(minutes=24 * 60)
    def on_start(self):
        self.crawl('https://hz.lianjia.com/ershoufang/', callback=self.index_page,validate_cert=False)

    @config(age=10 * 24 * 60 * 60)
    def index_page(self, response):
        for each in response.doc('.title').items():
            self.crawl(each.attr.href, callback=self.detail_page,validate_cert=False)

    @config(priority=2)
    def detail_page(self, response):
        yield {
            'unit_price':response.doc('.unitPrice').text(),
            'title': response.doc('.main').text(),
            'sell_point': response.doc('.baseattribute > .content').text()
        }
- @every(minutes=24 * 60) :通知 Scheduler 每天运行一次。
- @config(age=10 * 24 * 60 * 60) :设置任务的有效期限。
- @config(priority=2) :设定任务优先级
- on_start(self) :程序的入口。
- self.crawl(url, callback) :主方法,用于创建一个爬取任务。
- index_page(self, response) :用来抓取返回的 html 文档中对应标签的数据。
- detail_page(self, response) :返回一个 dict 对象作为结果。
我们点击运行按钮,如图所示:
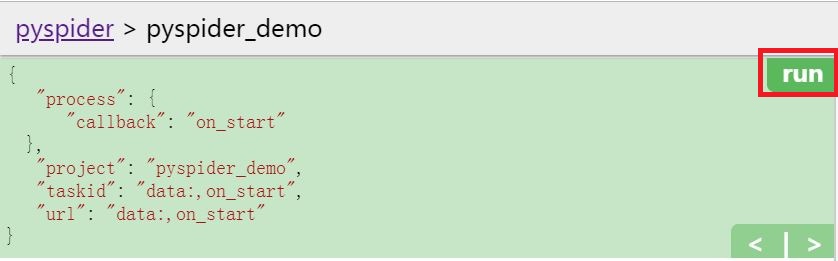
点击之后,我们发现
follows 按钮处出现了提示信息,如图所示:
点击 follows 按钮,结果如图所示:
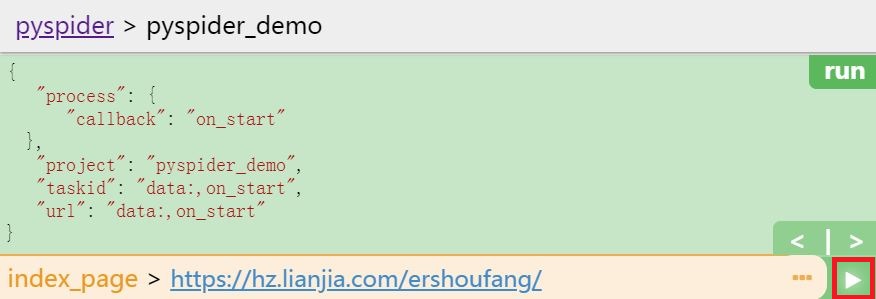
点击上图中红框圈起来的三角号按钮,结果如图所示:
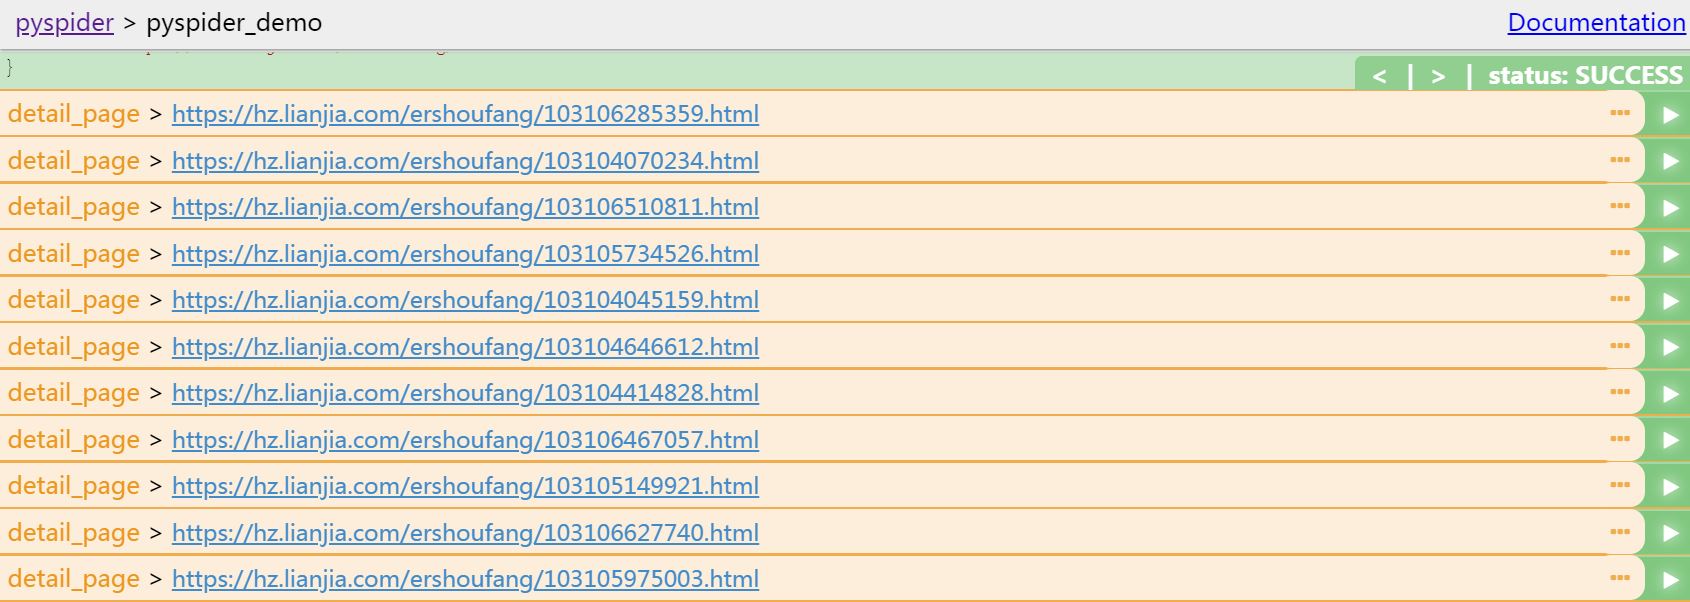
我们随意选一条 detail_page ,点击其右侧三角号按钮,结果如图所示:

从结果来看,已经可以爬取到我们需要的信息了。
4.3 数据存储
获取到信息之后,需要将信息存储起来,我们计划将数据存储到 MySQL 数据库。
首先,安装 pymysql ,命令如下:
pip install pymysql
接着添加保存代码,完整代码如下:
from pyspider.libs.base_handler import *
import pymysql

class Handler(BaseHandler):
    crawl_config = {
    }

    def __init__(self):
        # 下面参数修改成自己对应的 MySQL 信息
        self.db = MySQLdb.connect(ip, username, password, db, charset='utf8')

    def add_Mysql(self, title, unit_price, sell_point):
        try:
            cursor = self.db.cursor()
            sql = 'insert into house(title, unit_price, sell_point) values ("%s","%s","%s")' % (title[0],unit_price[0],sell_point);
            print(sql)
            cursor.execute(sql)
            self.db.commit()
        except Exception as e:
            print(e)
            self.db.rollback()

    @every(minutes=24 * 60)
    def on_start(self):
        self.crawl('https://hz.lianjia.com/ershoufang/', callback=self.index_page,validate_cert=False)

    @config(age=10 * 24 * 60 * 60)
    def index_page(self, response):
        for each in response.doc('.title').items():
            self.crawl(each.attr.href, callback=self.detail_page,validate_cert=False)

    @config(priority=2)
    def detail_page(self, response):
        title = response.doc('.main').text(),
        unit_price = response.doc('.unitPrice').text(),
        sell_point = response.doc('.baseattribute > .content').text()
        self.add_Mysql(title, unit_price, sell_point)
        yield {
            'title': response.doc('.main').text(),
            'unit_price':response.doc('.unitPrice').text(),
            'sell_point': response.doc('.baseattribute > .content').text()
        }
先测试一下是否能将数据保存到 MySQL 中,还是选一条 detail_page ,如图所示:

点击其右侧三角号按钮,结果如图所示:
从输出结果来看是执行了保存操作,我们再到 MySQL 中看一下,如图所示:

数据已经存到了 MySQL 中了。
上面我们是手动操作保存的数据,接下来看一下如何通过设置任务保存。
点击当前页左上角的 pyspider 按钮,如图所示:
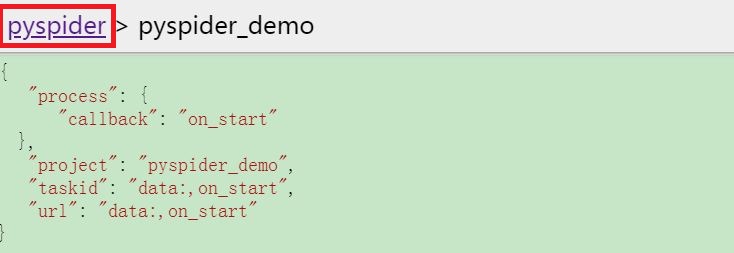
返回 dashboard 界面,如图所示:
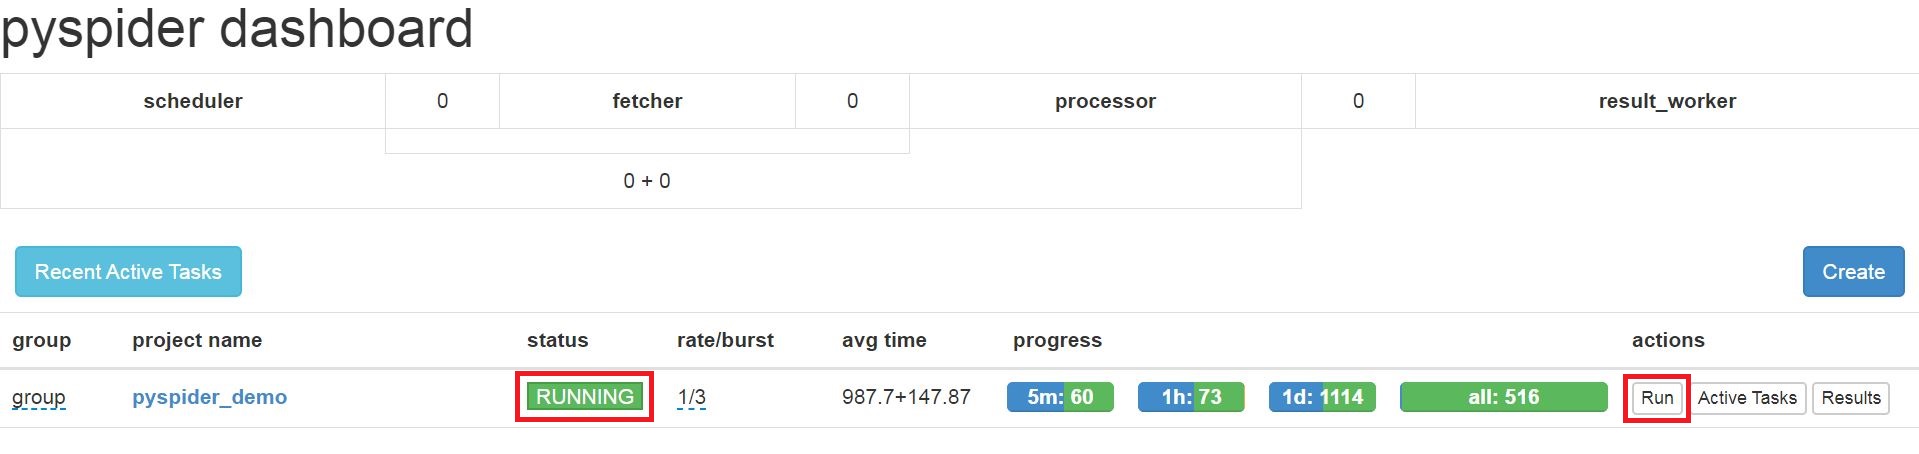
我们点击 status 下方红框圈住的位置,将状态修改为 RUNNING 或 DEBUG ,然后点击 actions 下方的 run 按钮即可。
参考: